Express Authentication Using JWT: A Step-by-Step Guide
Learn How to Implement Basic Authentication in Your Express.js Application with JsonWebTokens


#1 Introduction
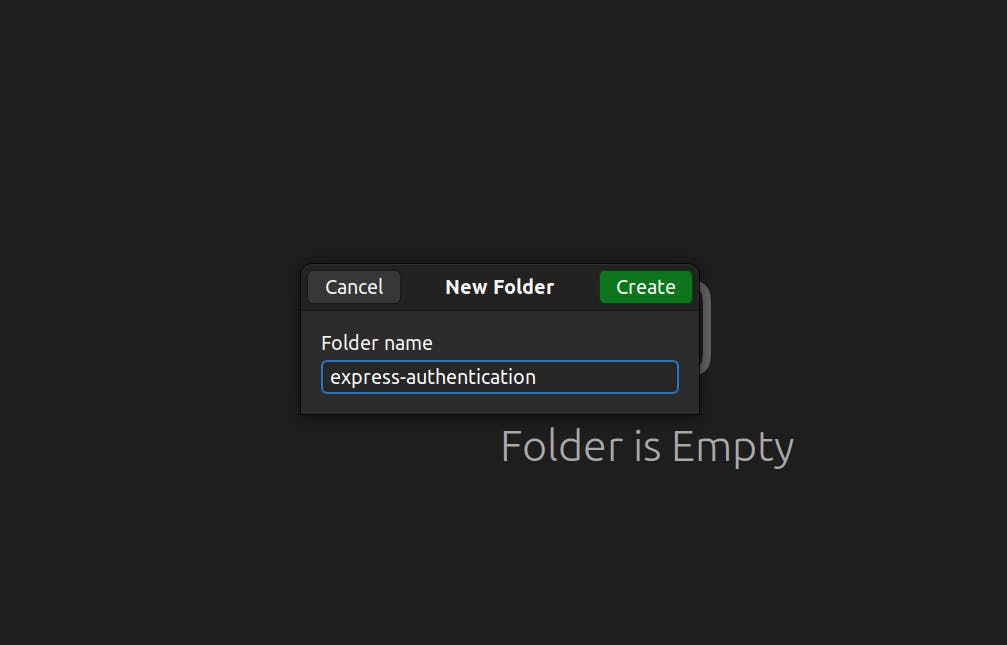
Express js is a framework used in web applications to serve the backend and connect to the database. It can be used to build APIs and backends. Let us start the project with an empty folder. Create a new folder with the following name.
After creating the folder, enter into the folder

Then, right-click on the folder and Open the terminal.


Now we need to start the installation part, before that we have to create a package.json file.
Note: Any project that builds on top of JavaScript will have the package.json file to know what libraries we need for this project.

The introductory part is over, Let's get into coding!
#2 Installation
Install the following packages.
npm i express mongoose jsonwebtoken bcrypt typescript dotenv cors @types/express @types/bcryptjs @types/node ts-node @types/nodemon @types/jsonwebtoken @types/cors
#3 App File
After the installation of the packages, create a app.ts file in the folder. Please type the following commands which I will explain quickly.
import express from "express";

const app = express();
const PORT = 5000;

app.get("/", (req, res) => {
  res.send("Hello from Express server!");
});

app.listen(PORT, () => console.log(`Server started at port:${PORT}`));
We have set the basic express server setup now and we need to add the routes to to implement the login and signup routes.
Before setting up the models, we have to do one more setup.
Let's set up the Typescript, just run the following command,
npx tsc --init
and a new file will be created on the file directory name tsconfig.json which is used to specify the Typescript compiler behaviour. One thing that we need to add to the tsconfig.json file.
{
  "compilerOptions": {
    ....
    /* Emit */
   "outDir": "./dist"      /* Specify an output folder for all emitted files. */,
    ....
   }
}
now the folder would look like
├ node_modules
├ app.ts
├ package-lock.log
├ package.json
└ tsconfig.json
After that, we need to model our user right!
This is where typescript comes in with a structured way of creating a User object with related fields.
The User has to have the following fields
Name
Email
Password
Token.
Make a folder named "types" and inside the folder, create a file named, Similarly, make a folder named "models" and inside the models, create a file named User.ts
├ node_modules
├ models
   └ User.ts
├ types
   └ User.ts
├ app.ts
├ package-lock.log
└ package.json
#4 Schema & Database Setup
User Schema
Get into the types/User.ts and type the following code.
interface User {
  name: String;
  email: String;
  password: String;
  token: String;
}

export default User;
In the above code, we created a User interface which is used to define the struct with its data elements. It makes the User have specific fields.
Get into the models/User.ts and type the following code.
import mongoose from "mongoose";
import User from "../types/User";

const userSchema = new mongoose.Schema<User>({
  name: {
    type: String,
    default: "",
  },
  email: {
    type: String,
    default: "",
    unique: true,
  },
  password: {
    type: String,
    default: "",
  },
  token: {
    type: String,
    default: "",
  },
});

export default mongoose.model("User", userSchema);
here, we created the User model to store the user in the database.
let's move on to the MongoDB setups
MongoDB
Go to mongodb.com and create an account. Once you sign up, you will be redirected to the page below. Fill them with the following details.

Make sure that you have selected the last plan, which is free and leave the rest as default. Now, click the Create button, to create a cluster for you.

Rename the username for your convenience and set up the password for the database. Then click on the Create User.

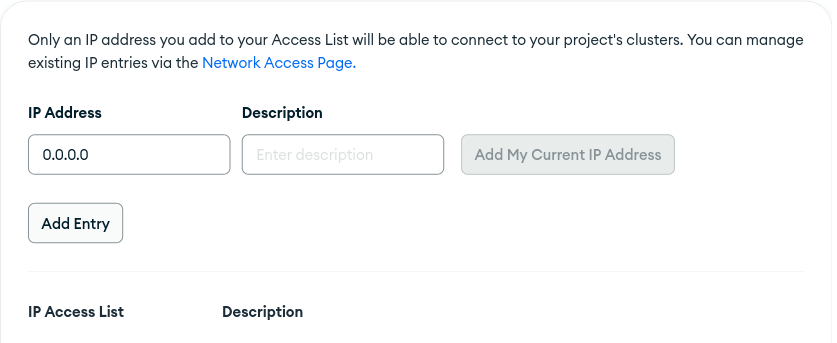
Add the IP Address as 0.0.0.0 and add an entry. Once done with the setup click on the finish button. Then you will redirected to the home page.
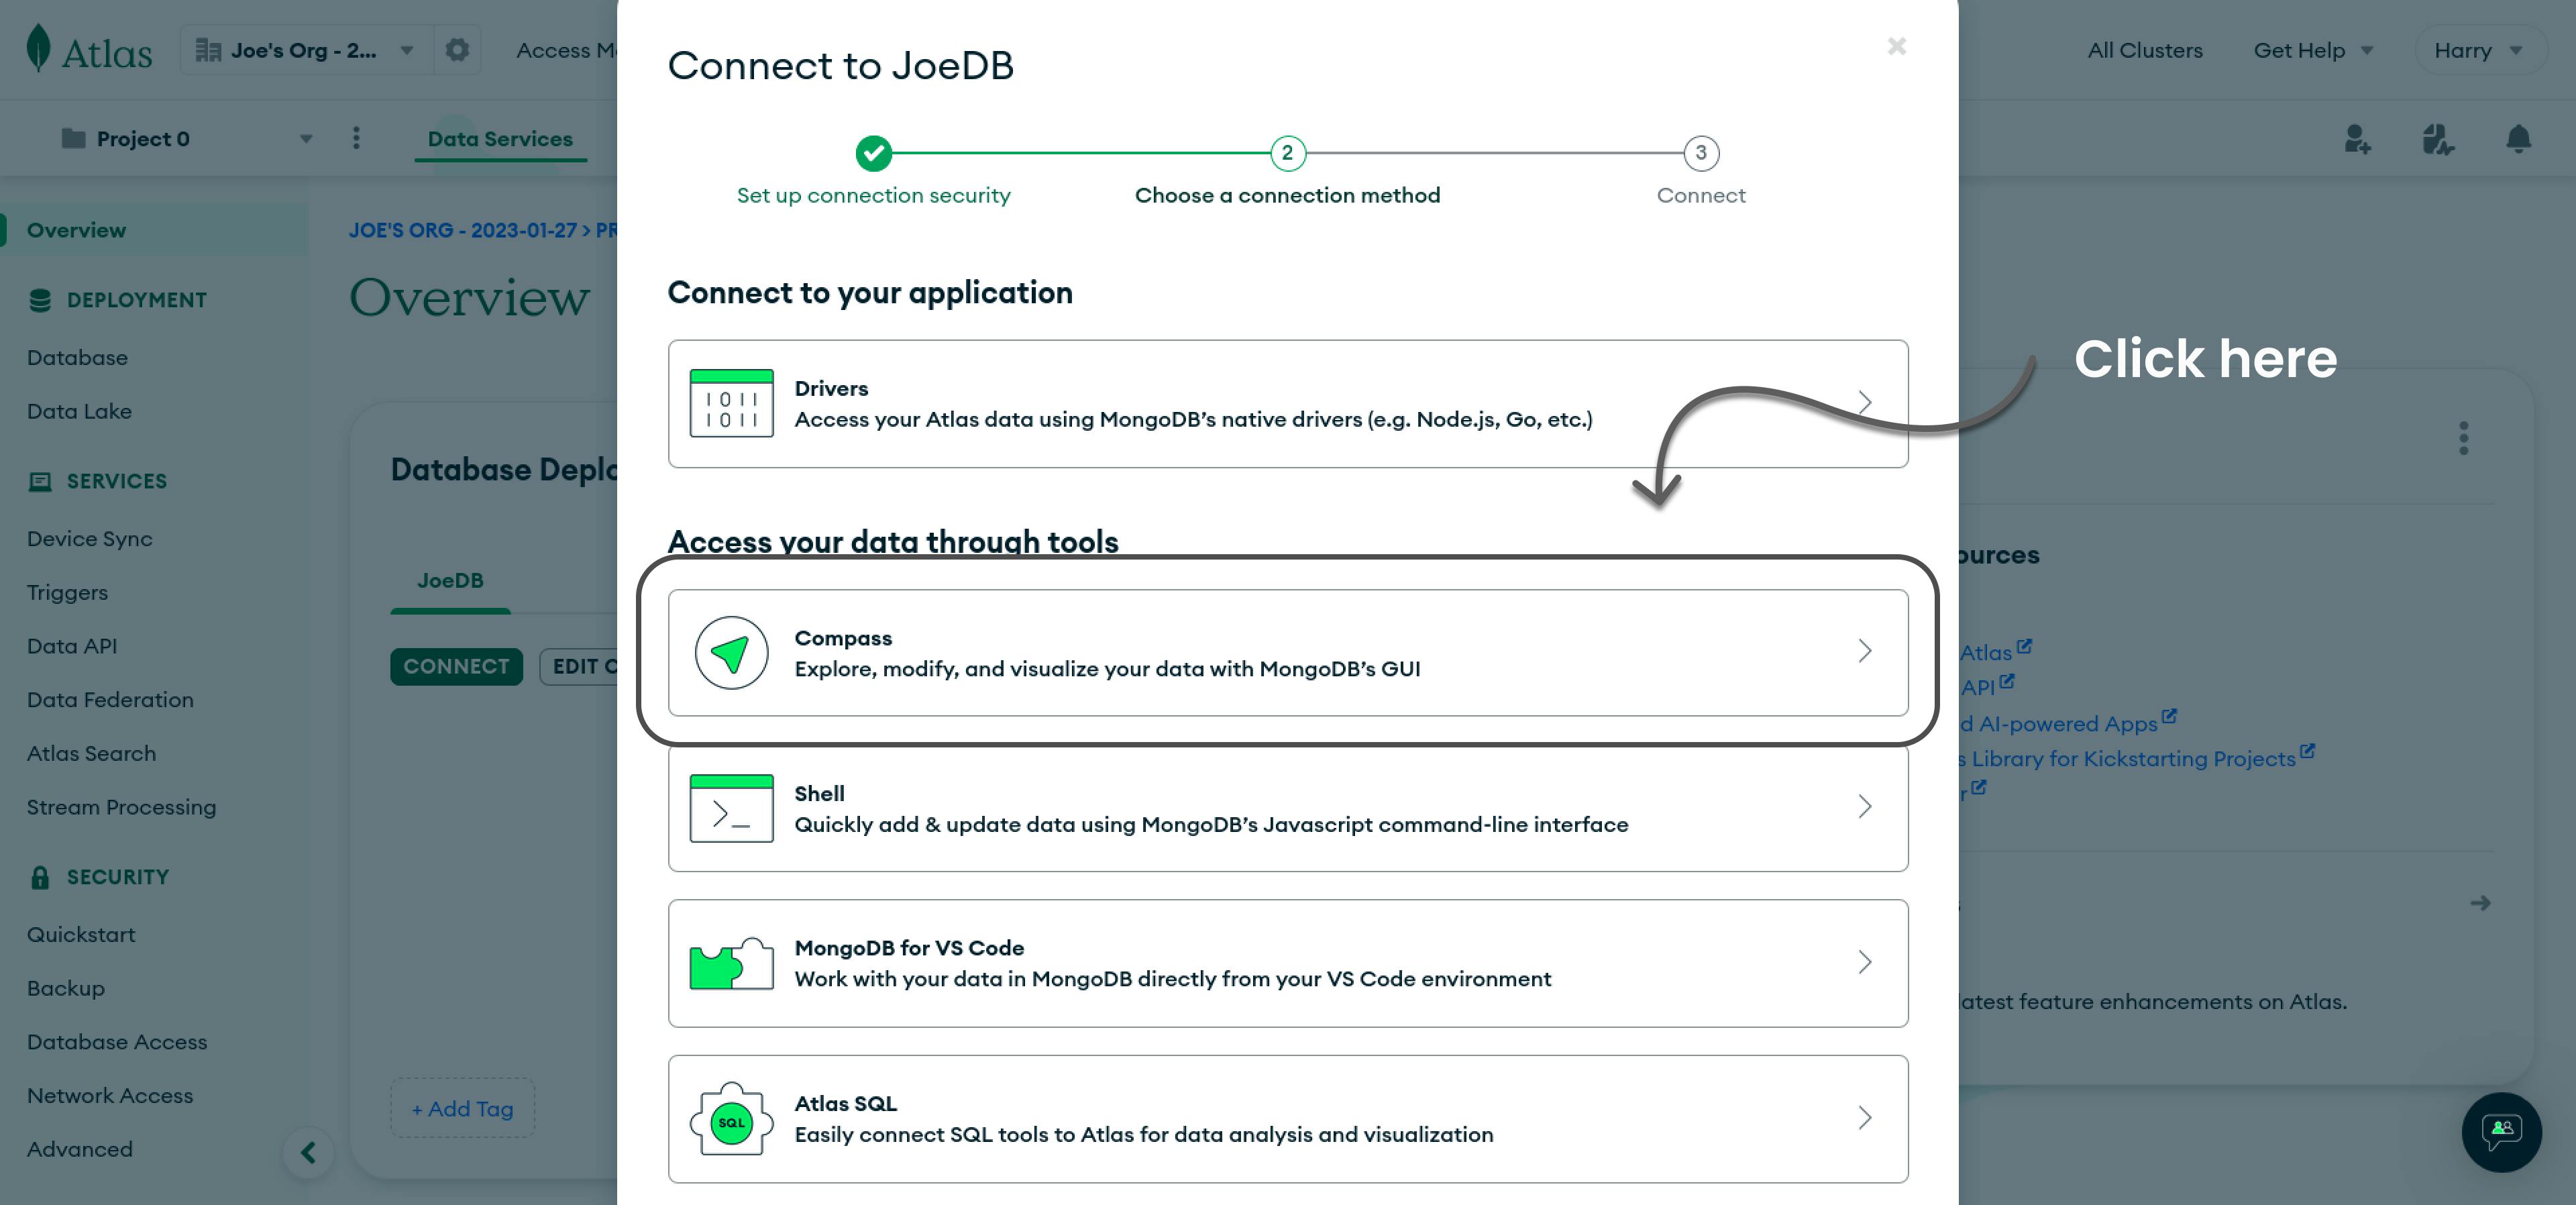
Here click on the CONNECT.

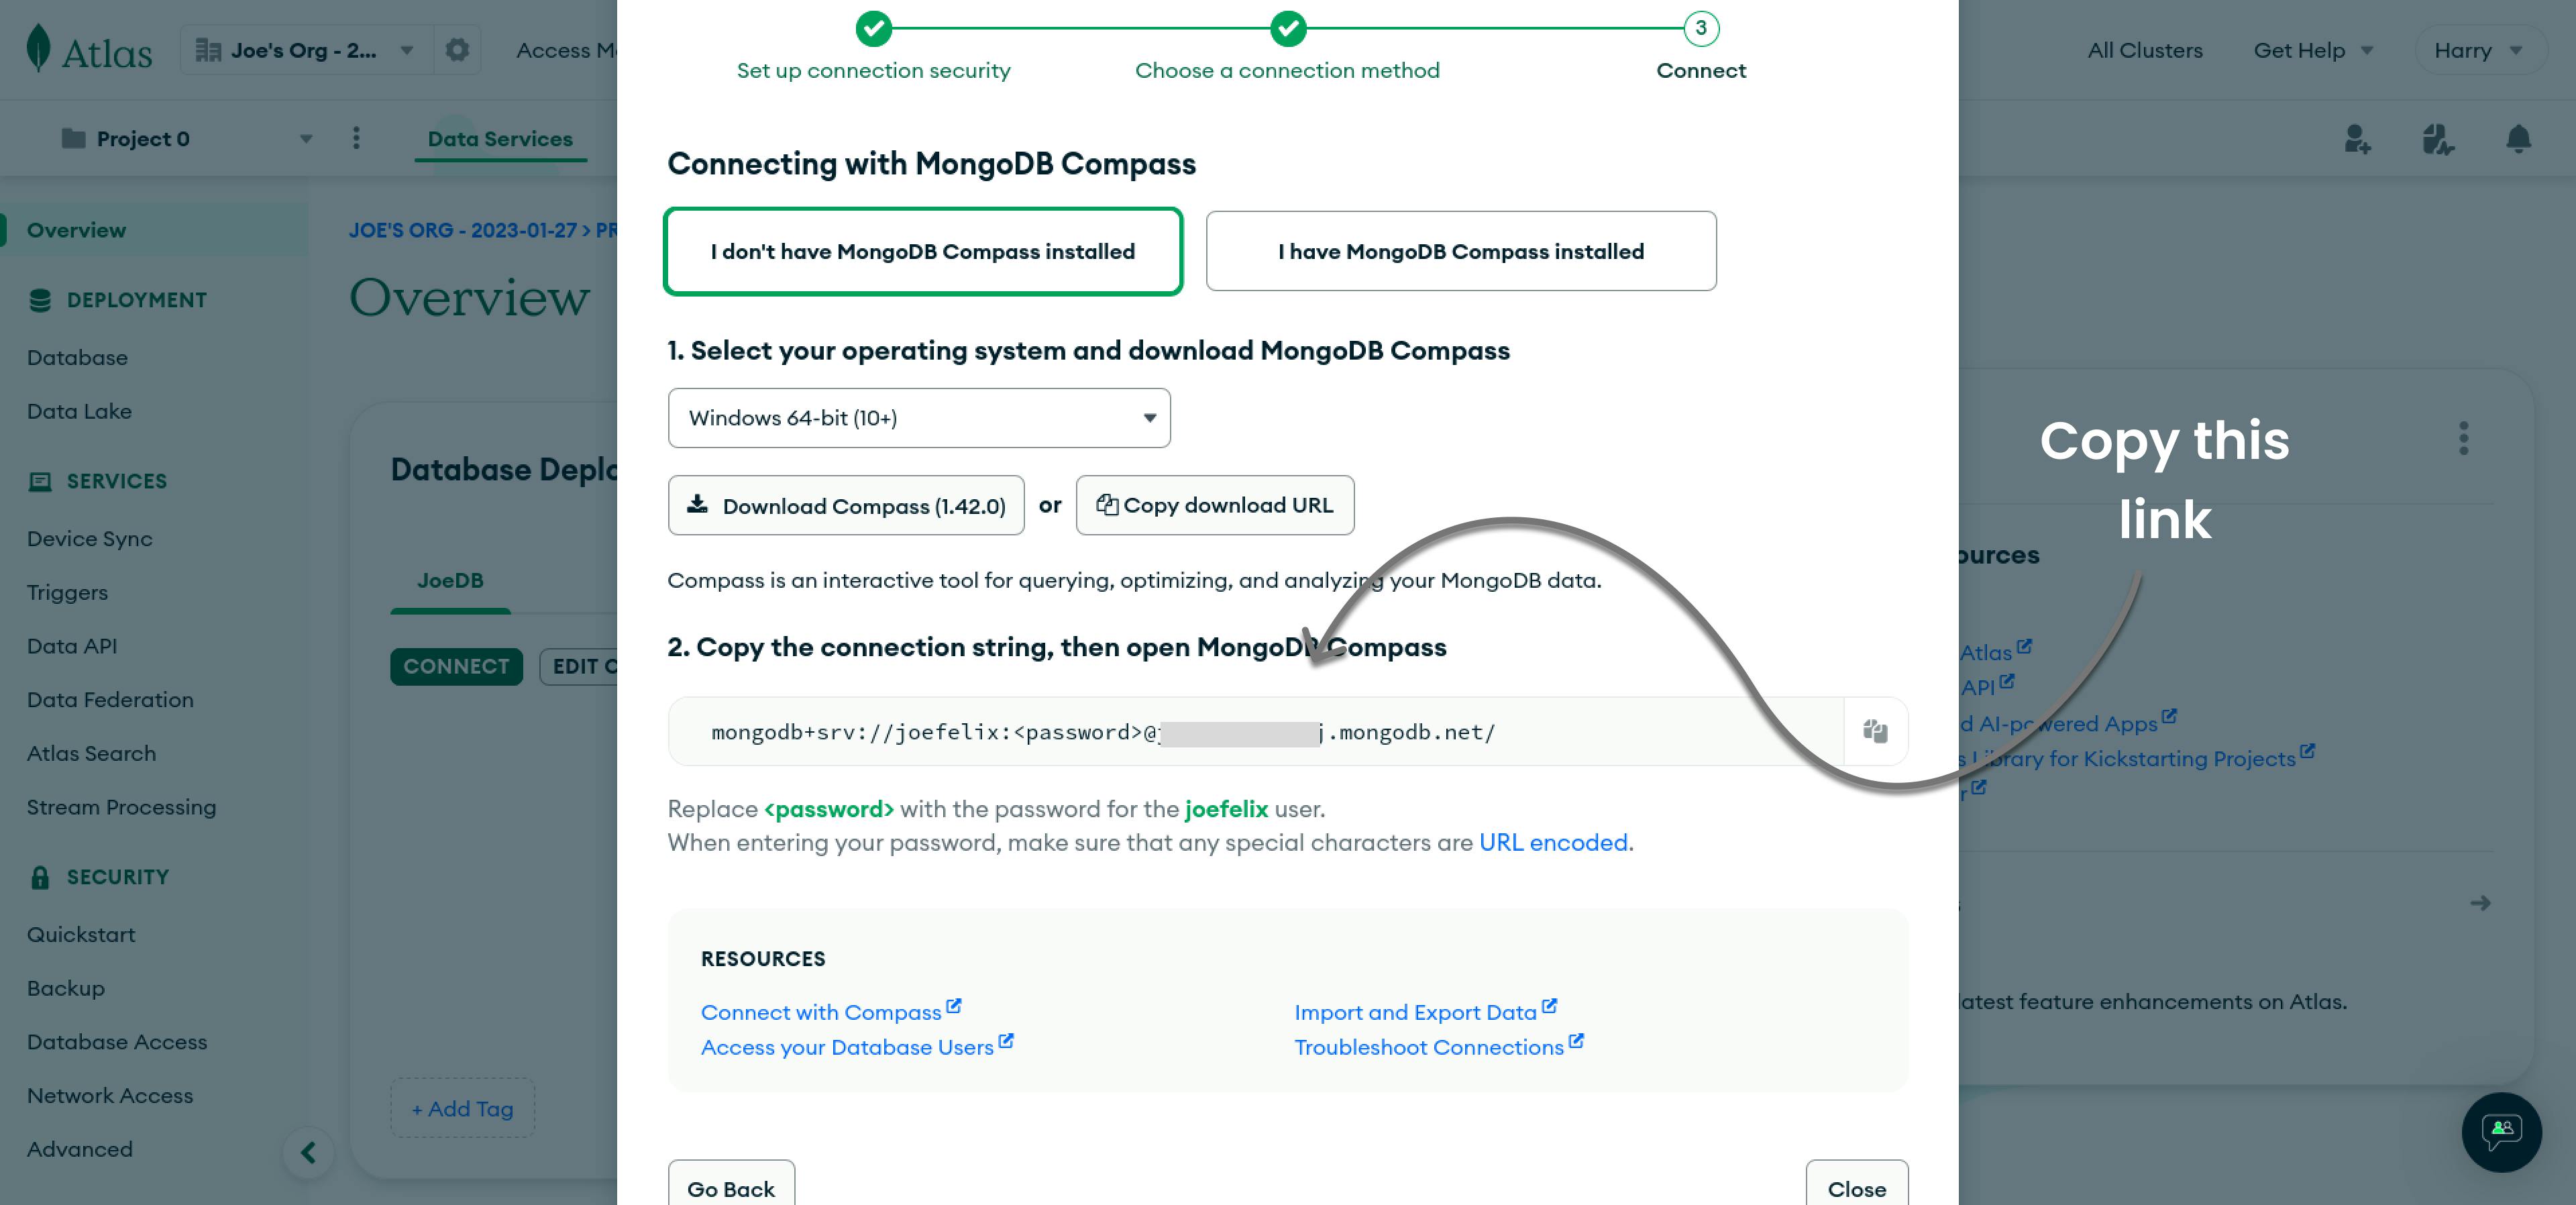
After copying the link paste it into the .env file and replace the password with the database password, you set in the previous step.

Setting up the Mongoose connection to the express server using the Mongoose module.
import dotenv from "dotenv";
dotenv.config();

import express from "express";
import cors from "cors";
import mongoose from "mongoose";

const app = express();
const PORT = 5000;

app.use(cors());

mongoose
  .connect(process.env.MONGO_URL!)
  .then(() => console.log("MongoDB is connected!"));

app.get("/", (req, res) => {
  res.send("Hello from Express server!");
});

app.listen(PORT, () => console.log(`Server started at port:${PORT}`));
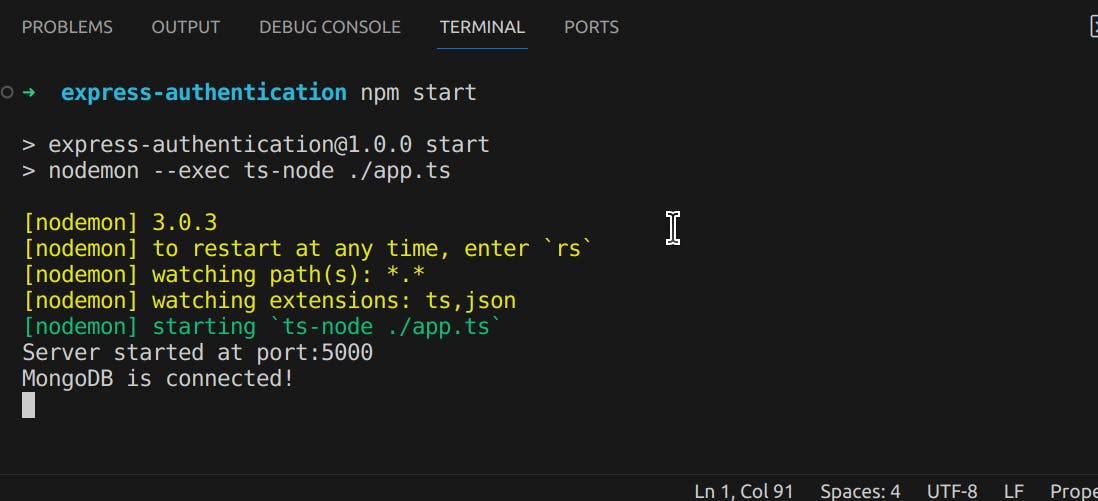
To check whether it is running, we need to install one more dependency, called nodemon to run the server continuously and update when any changes are made.
npm i nodemon --dev
And change the package.json to run the server.
"scripts": {
    "build": "tsc",
    "start": "nodemon --exec ts-node ./index.ts"
 },

After setting up, let's start the server. Run npm start to start the server.
npm start
#5 Defining Routes
Make a directory named routes. Inside the routes folder, create a file named auth.ts
├ node_modules
├ models
   └ User.ts
├ types
   └ User.ts
├ routes
   └ auth.ts
├ app.ts
├ package-lock.log
└ package.json
First, let's add the auth router in app.ts the file and configure the middleware such as cors, morgon, and express.json().
import dotenv from "dotenv";
dotenv.config();

import express from "express";
import mongoose from "mongoose";
import morgan from "morgan";
import cors from "cors";

import authRouter from "./routes/auth";

const app = express();
const PORT = 5000;

app.use(express.json());
app.use(cors());
app.use(morgan("tiny"));

mongoose
  .connect(process.env.MONGO_URL!)
  .then(() => console.log("MongoDB is connected!"));

app.get("/", (req, res) => {
  res.send("Hello from Express server!");
});
app.use("/auth", authRouter);

app.listen(PORT, () => console.log(`Server started at port:${PORT}`));
Sign up route
The signup route has the user data such as name, email, and password in the database. Let's define the signup route.
I will break down the code for better understanding,
Firstly, I'm importing the express and creating an instance of the Router from the express package.
import express from "express";

const router = express.Router();
Then, create the signup route to get the user data.
import express from "express";

const router = express.Router();

router.post("/signup", async (req, res) => {}
With the route being created, let's get the user data.
import express from "express";

const router = express.Router();

router.post("/signup", async (req, res) => {
  try {
    const { name, email, password } = req.body;

    const foundUser = await User.findOne({ email: email });

    if (foundUser) {
    // redirect to login
    }
  } catch (error) {
    console.log(error);
  }
}
Check whether the user already exists in the database or not. If the user is in the database, redirect them or send a message to go /login.
If not, hash the password of the user and sign a JWT token with email, name.
Store the JWT_SECRET in .env file and secret can be any string of your choice but don't openly in the auth.ts file.
.env
JWT_SECRET=helloworld
/auth.ts
 // hashing the password
const saltRounds = await bcrypt.genSalt(10);
const hashedPassword = await bcrypt.hash(password, saltRounds);

// signing JWT token
const token = jwt.sign({ name, email }, process.env.JWT_SECRET!, {
    expiresIn: "7d",
});
After that, save the user hashed password and token along with the user data in a database.
// storing user in the database
const user = new User({ name, email, password: hashedPassword, token });
const saverUser = await user.save();
Finally, let's make the response more clear and standard. Defining a ResponseType will be a good practice.
type StatusType =
  | "SIGNED_UP"
  | "LOGGED_IN"
  | "LOGGED_OUT"
  | "USER_EXISTS"
  | "USER_NOT_FOUND"
  | "FAILED"
  | "UNAUTHORISED"
  | "INVALID_PASSWORD"
  | "TOKEN_EXPIRED";

interface ResponseType {
  status: StatusType;
  message: String | JSON | null;
}
Now, the signup route will look like,
import express from "express";
import bcrypt from "bcrypt";
import jwt from "jsonwebtoken";
import User from "../models/User";

const router = express.Router();

type StatusType =
  | "SIGNED_UP"
  | "LOGGED_IN"
  | "LOGGED_OUT"
  | "USER_EXISTS"
  | "USER_NOT_FOUND"
  | "FAILED"
  | "UNAUTHORISED"
  | "INVALID_PASSWORD"
  | "TOKEN_EXPIRED";

interface ResponseType {
  status: StatusType;
  message: String | JSON | null;
}

router.post("/signup", async (req, res) => {
  try {
    const { name, email, password } = req.body;

    const foundUser = await User.findOne({ email: email });

    if (foundUser) {
      const response: ResponseType = {
        status: "USER_EXSIST",
        message: "Go to Login",
      };

      return res.status(400).json(response);
    }

    // hashing the password
    const saltRounds = await bcrypt.genSalt(10);
    const hashedPassword = await bcrypt.hash(password, saltRounds);

    // signing JWT token
    const token = jwt.sign({ name, email }, process.env.JWT_SECRET!, {
      expiresIn: "7d",
    });

    // storing user in the database
    const user = new User({ name, email, password: hashedPassword, token });
    const saverUser = await user.save();

    const response: ResponseType = {
      status: "SIGNED_UP",
      message: saverUser.token,
    };

    res.status(201).json(response);
  } catch (error) {
    console.log(error);
  }
});

export default router;
To see the requests coming inside, we need to install one more dependency, named morgon. It is used to display the incoming request in the terminal.
npm install --save morgan @types/morgan
If not installed to ThunderClient extension in vscode do install it.
We are going to sign up a user. For that we need ThunderClient. Let's send a post request to sign up. After the request is sent, the response contains the status & message.
The message contains the token used to verify user authorization.

Morgan dependence is useful because it displays the incoming request like this,

Login route
Similar to the signup route, the login route will receive an email, and password in the request body and it is used to find the user in the database.
Once the user is found, the password will be compared.
router.post("/login", async (req, res) => {
  try {
    const { email, password } = req.body;

    const user = await User.findOne({ email: email });

    if (user && password) {
      bcrypt.compare(password, String(user.password)).then(() => {
        const response: ResponseType = {
          status: "LOGGED_IN",
          message: user.token,
        };

        return res.status(200).json(response);
      });

      const response: ResponseType = {
        status: "INVALID_PASSWORD",
        message: "Provide a valid password",
      };

      return res.status(400).json(response);
    }

    const response: ResponseType = {
      status: "USER_NOT_FOUND",
      message: "Please Sign up a new user.",
    };

    return res.status(404).json(response);
  } catch (error) {
    console.log(error);

    const response: ResponseType = {
      status: "FAILED",
      message: "Something went wrong!",
    };

    return res.status(500).json(response);
  }
});
Make a login request to the server,
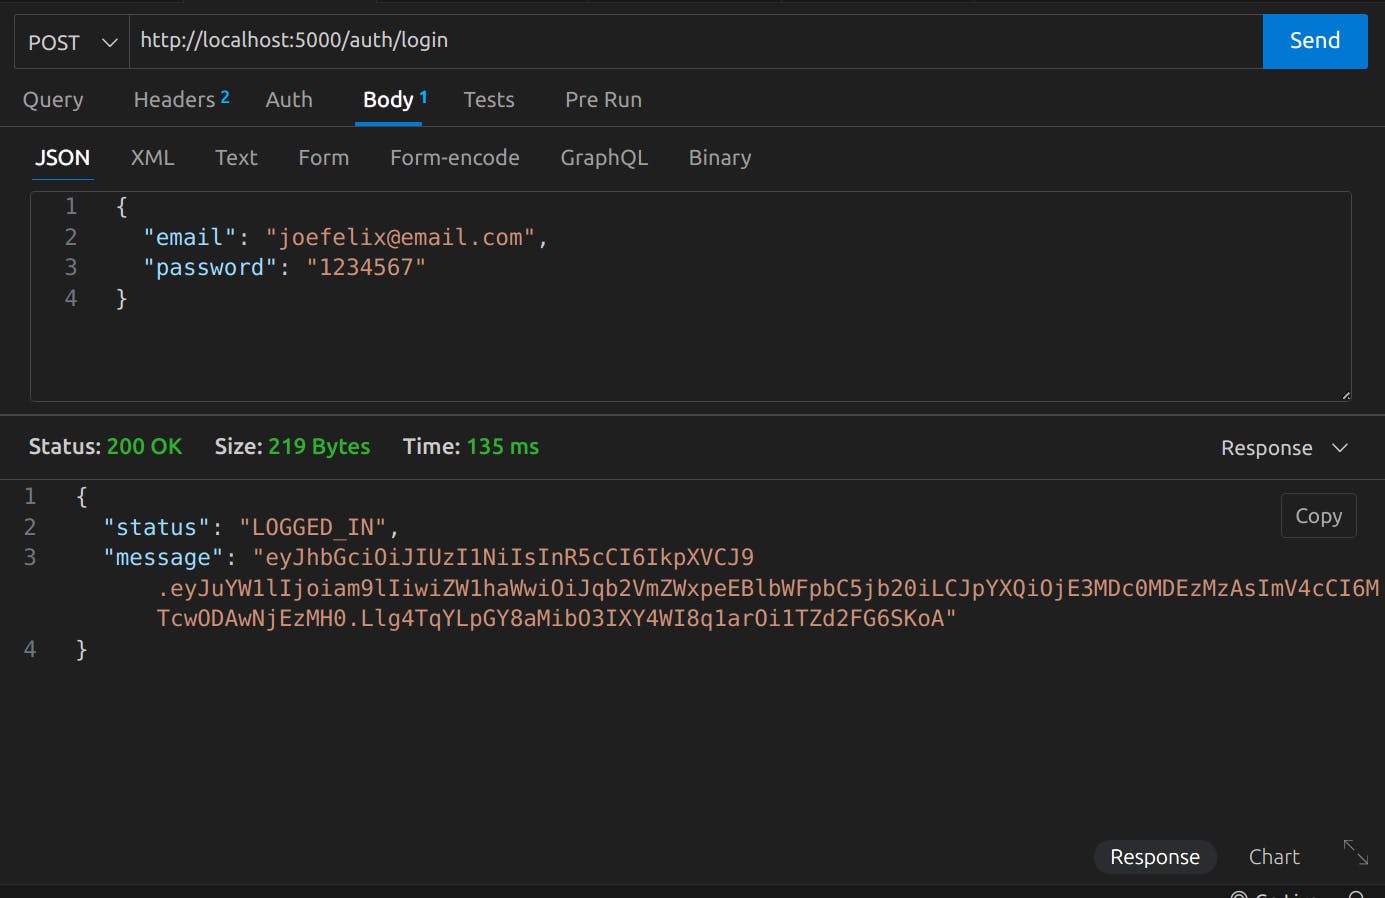
The token can be stored in the cookies or local storage on the client side.
auth.ts
import express from "express";
import bcrypt from "bcrypt";
import jwt from "jsonwebtoken";
import User from "../models/User";

const router = express.Router();

type StatusType =
  | "SIGNED_UP"
  | "LOGGED_IN"
  | "LOGGED_OUT"
  | "USER_EXISTS"
  | "USER_NOT_FOUND"
  | "FAILED"
  | "UNAUTHORISED"
  | "INVALID_PASSWORD"
  | "TOKEN_EXPIRED";

interface ResponseType {
  status: StatusType;
  message: String | JSON | null;
}

router.post("/signup", async (req, res) => {
  try {
    const { name, email, password } = req.body;

    const foundUser = await User.findOne({ email: email });

    if (foundUser) {
      const response: ResponseType = {
        status: "USER_EXISTS",
        message: "Go to Login",
      };

      return res.status(400).json(response);
    }

    // hashing the password
    const saltRounds = await bcrypt.genSalt(10);
    const hashedPassword = await bcrypt.hash(password, saltRounds);

    // signing JWT token
    const token = jwt.sign({ name, email }, process.env.JWT_SECRET!, {
      expiresIn: "7d",
    });

    // storing user in the database
    const user = new User({ name, email, password: hashedPassword, token });
    const saverUser = await user.save();

    const response: ResponseType = {
      status: "SIGNED_UP",
      message: saverUser.token,
    };

    res.status(201).json(response);
  } catch (error) {
    console.log(error);

    const response: ResponseType = {
      status: "FAILED",
      message: "Something went wrong!",
    };

    return res.status(500).json(response);
  }
});

router.post("/login", async (req, res) => {
  try {
    const { email, password } = req.body;

    const user = await User.findOne({ email: email });

    if (user && password) {
      await bcrypt.compare(password, String(user.password)).then(() => {
        const response: ResponseType = {
          status: "LOGGED_IN",
          message: user.token,
        };

        return res.status(200).json(response);
      });

      const response: ResponseType = {
        status: "INVALID_PASSWORD",
        message: "Provide a valid password",
      };

      return res.status(400).json(response);
    }

    const response: ResponseType = {
      status: "USER_NOT_FOUND",
      message: "Please Sign up a new user.",
    };

    return res.status(404).json(response);
  } catch (error) {
    console.log(error);

    const response: ResponseType = {
      status: "FAILED",
      message: "Something went wrong!",
    };

    return res.status(500).json(response);
  }
});

export default router;
#6 Conclusion
We successfully created the basic authentication system in Express with JSON web token. I will then implement more features in the following blogs.
I will provide the github code for the project, you can check it out!
Stay tuned!
Joe Felix👋